Push To Live your Staging with Softaculous
Overview
This guide will help you how to push the Staging installations to live.
You can refer the guide here on how to create staging Create_Staging
NOTE : On every “Push to Live”, Softaculous will create a backup.
We will be taking an example of a WordPress installation.
1) Login to your Control Panel
- Go to your control panel and login with your details.
- There click on the Softaculous Icon or Link.
- The Softaculous Enduser Panel will be displayed.
- Go to all installations page.

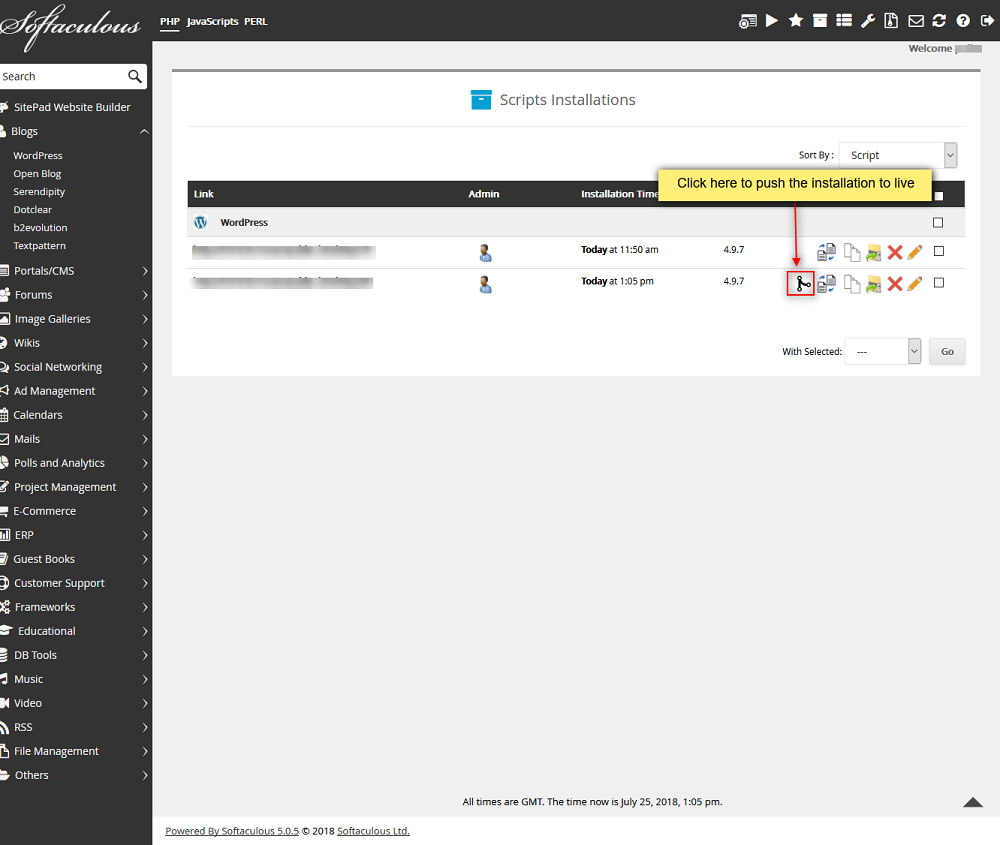
2) Choose the Staging installation you want to push to live.
- Click on the Push To Live icon.
- The Push to live page will appear.
3) You will see two sections to push the installation
DEFAULT PUSH :
This will replace all the files of your live installation with the ones in Staging installation and will erase the live database and import the database from your staging installation.

CUSTOM PUSH :
In this section you will be able to select files, full database and tables structures and tables data you want to push.
- Click on the Push To Live button and this should do the trick. The time taken may vary in accordance to size of your installation, So please be patient.
- That’s it !! Your staging installation data changes have been pushed to your live installation.
NOTE : Before pushing installation Softaculous will create backup based on what you are pushing e.g if only files are pushing then only files will be included in backup.
NOTE : You will receive the pushed installation details via email (if the emails are enabled).

Recommended Posts
Backup your site to Google Drive & Dropbox
24th January 2021

Manage your sites with WordPress Manager
24th January 2021

6 Reasons Why You Should Backup Your Website
18th September 2018